Introduction
Greek Baklava Recipe is more than a sweet treat, it’s a legacy of golden phyllo, toasted nuts, and honey syrup wrapped in centuries-old Greek tradition. In this guide, you’ll learn how to make the perfect Greek Baklava from scratch, using the same techniques I grew up with in my grandmother’s kitchen. From the spiced nut mixture to the way syrup is poured over hot layers, every step matters. I’ll also answer your top questions, like how Greek Baklava differs from Turkish, and how pistachios add a flavorful twist. Get ready to master the art of Greek Baklava with this authentic recipe.
Table of Contents
Table of Contents :
The Greek Baklava Story : Family, Flavor & Heritage
Growing up with filo and folklore
Baklava has always been at the heart of my Greek roots. I remember standing on a step stool next to my yiayia as she spread golden butter over whisper-thin sheets of phyllo dough. Our Asheville kitchen would fill with the aroma of cinnamon, cloves, and toasted nuts, an unmistakable scent of celebration. For us, baklava wasn’t just dessert, it was ritual. A layered labor of love that graced Easter tables, wedding feasts, and every Sunday visit when relatives overflowed the house.
That first taste of traditional Greek baklava, layered with almonds, walnuts, and pistachios, became my guiding inspiration. It showed me the value of patience, the importance of precision, and how a simple pour of syrup can hold centuries of stories. Every layer had intention. Every clove pushed into a diamond slice was a tiny nod to the past. Even now, whenever I prepare Greek Baklava, I’m reminded of those quiet Sunday mornings scented with cloves and tradition
Why Greek baklava is all about balance
Greek baklava is often mistaken as just a sweet treat, but it’s so much more than sugar. It’s about balance, crispness versus syrup, spice versus nut, memory versus innovation. Unlike other versions, Greek baklava tends to use a mixture of almonds and walnuts, with pistachios often adding flair or finishing texture. The syrup isn’t overbearing, it’s subtly spiced and citrusy, complementing rather than drowning the pastry. In fact, the process of pouring cooled syrup over hot pastry is a signature Greek technique, ensuring the perfect flaky crunch.
When done right, each bite cracks and melts, speaking not just of flavor, but of origin.
Print
Greek Baklava Recipe – Traditional & Irresistible Layers
- Total Time: 1 hour 45 minutes
- Yield: 24 slices 1x
Description
Layers of golden phyllo, decadent nuts, and aromatic syrup. Experience the magic of this Greek-style baklava recipe!
Ingredients
3 cup sugar (white)
2 cup water
1 lemon (small)
1 cinnamon stick
6 cloves (whole)
1 tablespoon honey
375 grams filo pastry (phyllo pastry)
3 cup almonds (crushed)
1 cup walnuts (crushed)
1 cup pistachios (crushed)
1 tablespoon ground cinnamon
1 teaspoon ground cloves
1 tablespoon sugar (raw)
24 cloves (whole)
250 grams melted butter (unsalted)
2 tablespoon water
Instructions
1. To a saucepan add: sugar, water, lemon juice, cinnamon stick, cloves, honey.
2. Mix and bring to a boil. Simmer 1 minute and cool.
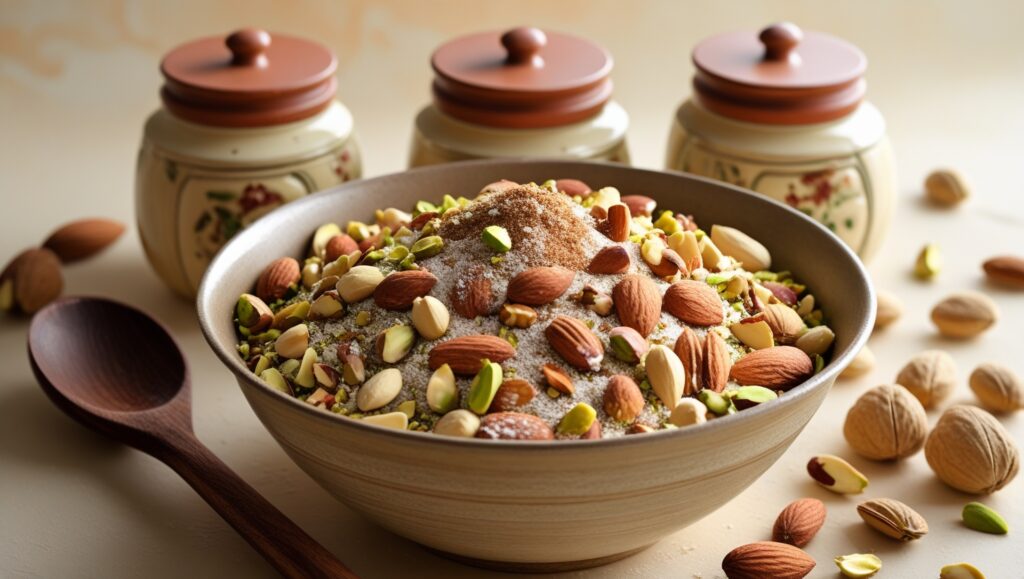
3. Crush nuts and mix with cinnamon, cloves, and sugar.
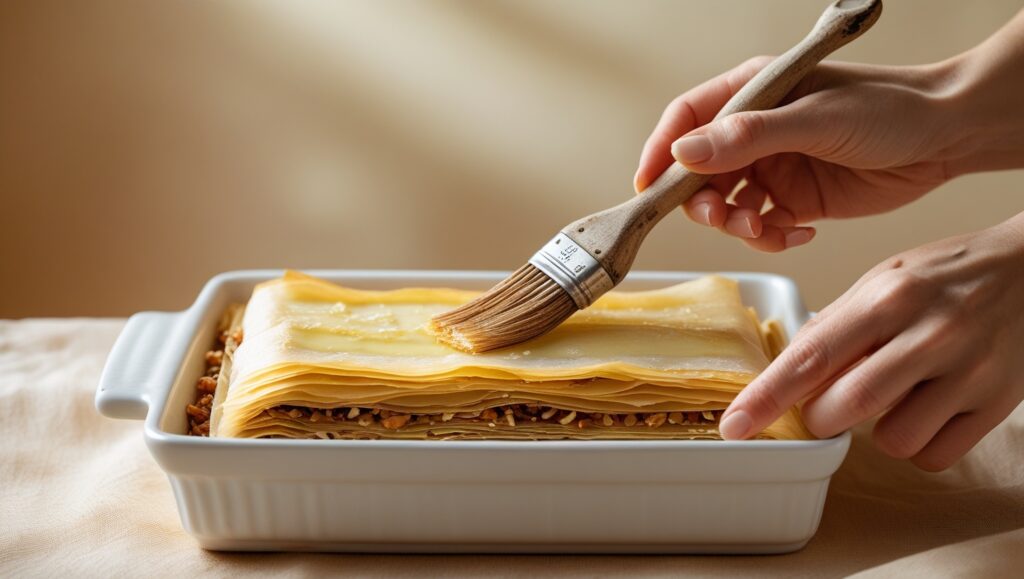
4. Butter dish bottom. Layer 3 sheets filo, brush with butter.
5. Add 2 sheets filo, butter, then 1 cup nut mixture.
6. Repeat: filo layers and nut mixture, 3 times total.
7. Top with remaining filo layers, buttering between each.
8. Final sheet trimmed to fit dish. Add butter-water mix on top.
9. Score baklava into 24 triangles. Add a clove to each (optional).
10. Bake 20 mins at 200°C, then 40 mins at 100°C.
11. Immediately pour cooled syrup over hot baklava.
12. Rest for a few hours. Cut fully and serve.
Notes
Do not pour hot syrup over hot baklava or it will get soggy.
Let baklava rest several hours before serving for best texture.
Store loosely covered at room temp for up to 5 days.
- Prep Time: 45 minutes
- Cook Time: 1 hour
- Category: Dessert
- Method: Baking
- Cuisine: Greek
Nutrition
- Serving Size: 1 slice
- Calories: 390
- Sugar: 28g
- Sodium: 145mg
- Fat: 24g
- Saturated Fat: 7g
- Unsaturated Fat: 16g
- Trans Fat: 0.3g
- Carbohydrates: 41g
- Fiber: 4g
- Protein: 7g
- Cholesterol: 22mg
How to Make Greek Baklava: Tips for Perfect Layers
The role of phyllo: fragile, flaky, essential

Greek Baklava always starts with delicate phyllo pastry, paper-thin sheets that become golden, crisp layers once baked. Handling phyllo can be intimidating, but the key is confidence and moisture control. Always keep unused sheets covered with a slightly damp towel to prevent drying out. When layering, I use three base sheets, brushing each with melted butter. Then I alternate two sheets with butter, then a generous handful of spiced nut mixture, repeating until I’ve used every last cup of this delicious Greek Baklava base.
This layering technique not only creates the classic height and crunch baklava is known for but also builds a subtle flavor progression from bottom to top. In my grandmother’s words, “Don’t rush the layers, they’re what carry the story.”
Choosing the right nut blend for Greek baklava

Greek baklava is unique in its nut combination. While Turkish styles often favor pistachios alone, the Greek approach balances crushed almonds, walnuts, and pistachios. I’ve kept that trio in my recipe, three cups of almonds form the foundation, walnuts bring warmth, and pistachios offer a naturally sweet finish and a green pop of color.
To make the most of this blend, I lightly crush the nuts in a blender (never to a powder). Then I season them with ground cinnamon, cloves, and just a touch of raw sugar. This spiced mixture becomes the fragrant core between every buttery layer. If you’re seeking flavor depth, don’t skip the cloves, they round out the sweetness with a subtle, almost floral heat.
Want to experiment? Try adding a pinch of orange zest to the nut mixture, or swap half the almonds with hazelnuts for a nuttier profile. But always keep the balance of texture and spice true to its Greek soul.A carefully balanced nut blend is what gives Greek Baklava its signature taste and bite.
For another nostalgic dessert that honors tradition, try the Pastel de Tres Leches or the comforting layers of the Dream Cake Drømmekage.
Greek Baklava Baking and Syrup Timing Secrets
How to cut and bake baklava the Greek way
One of the most critical (and often overlooked) steps in making Greek baklava is the cutting. Always score your Greek Baklava before baking. The pastry is too fragile once cooked, and cutting it afterward can shatter the delicate layers. I typically cut mine into 24 triangles in a 40×27 cm pan, but you can do squares or diamonds, just make sure not to slice all the way through. That final cut comes later, after the syrup soaks in and softens the base.
For baking, start with a hot oven 200°C for the first 20 minutes to puff the layers. Then reduce to 100°C for another 40 minutes. This slow finish crisps the bottom and gives the entire tray a golden uniformity. You’ll know it’s done when the top is glossy and firm to the touch.
The syrup: timing, temperature, and taste
Syrup elevates Greek Baklava from a crisp pastry into a sweet, honey-soaked masterpiece. The trick? Always pour cool syrup over hot Greek Baklava, or vice versa, but never both hot. This contrast is what gives baklava its signature texture: crispy on top, tender inside, never soggy.
I follow a classic Greek approach for my syrup: a mix of three cups sugar, two cups water, the juice of one lemon, a cinnamon stick, six cloves, and a spoonful of honey. After bringing it to a boil and letting it simmer briefly, I cool it completely while the baklava bakes. The moment it comes out of the oven, I pour the syrup generously over each piece.
Let the baklava sit for at least a few hours, ideally overnight. This rest time allows the syrup to permeate each layer without collapsing the crisp top.
For a Greek dessert that’s equally syrupy but with citrus flair, explore the Filipino Ube Crinkle Cookies for a colorful twist on tradition.
Serving, Storing & Upgrading Your Greek Baklava
Greek baklava pistachio: a modern twist on a classic
While traditional Greek baklava uses a mix of almonds and walnuts, pistachios have surged in popularity, and for good reason. Their natural sweetness and rich green color make every slice pop. If you’re looking for a pistachio-forward variation, you can swap out the almonds or walnuts for more pistachios, or simply increase their ratio in the nut blend.
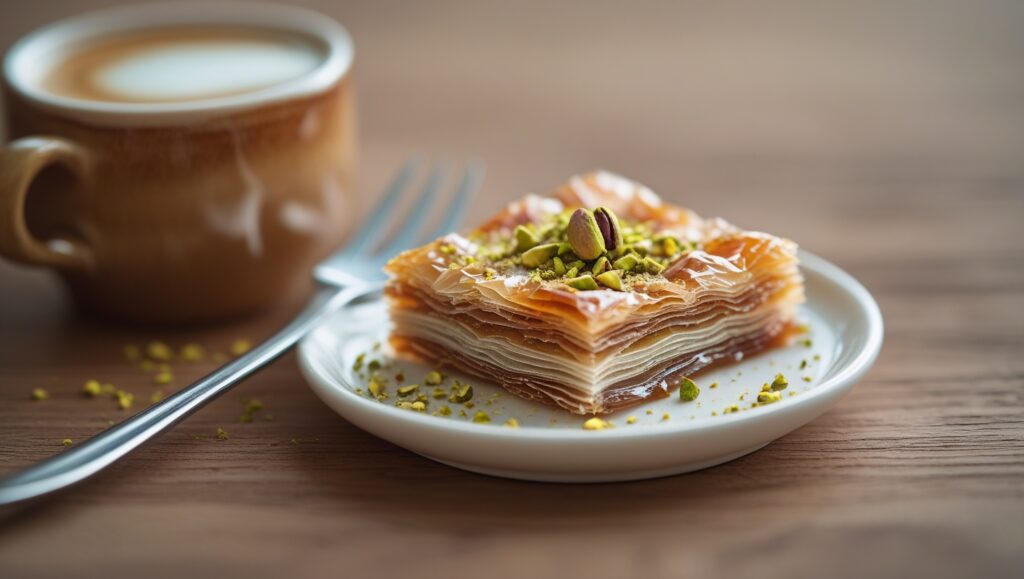
Personally, I love to reserve a handful of crushed pistachios to sprinkle on top just before serving. Not only does it add crunch and color, but it also announces that this is no ordinary baklava, it’s pistachio Greek baklava. Serve it with a spoonful of Greek yogurt or a twist of lemon peel for an elegant contrast.
How to serve, store, and savor every bite
Greek baklava shines best at room temperature, after it has had several hours to rest and absorb the syrup. That’s when the flavors bloom and the texture settles into that perfect crisp-yet-tender bite.
To serve, slice fully through the pre-cut lines and gently lift each piece with a small spatula. One trick I’ve learned? Clean the knife between cuts to maintain neat, defined layers.
Baklava stores beautifully. Cover it loosely with foil or parchment (never airtight, it’ll lose its crispness) and keep it on the counter for up to five days. You can refrigerate it for longer storage, though it may soften slightly. To re-crisp, place slices in a low oven for five minutes.
Greek baklava also freezes well, just skip the syrup step, freeze tightly wrapped layers, then bake and syrup fresh when ready.
Whether you’re gifting it, serving it at a holiday table, or indulging with coffee, baklava tells a story in every bite. Let yours speak of flavor, family, and a bit of Greek magic.
Conclusion: A Slice of Story in Every Layer

Greek baklava isn’t just dessert, it’s history folded in butter, seasoned with memory, and finished in honeyed syrup. Whether you’re honoring your heritage or exploring something new, this recipe invites you to savor the richness of Greek tradition one crisp, golden layer at a time. Let your Greek Baklava sit, share it slowly, and don’t forget that final clove, it’s not just garnish, it’s legacy.
For more recipe follow me in pinterest
Frequently Asked Questions About Greek Baklava
What is baklava called in Greek?
In Greek, baklava is written as “μπακλαβάς” and pronounced bak-la-VAS. Though the name appears in many cultures, in Greece it refers to the traditional dessert made with layers of phyllo dough, a blend of nuts typically almonds and walnuts, and a fragrant syrup infused with lemon, honey, and spices. It’s a cherished treat served during holidays, name day celebrations, and even relaxed Sunday meals.
Greek baklava vs Turkish baklava—what’s the difference?
Though both Greek and Turkish baklava use phyllo dough, nuts, and syrup, there are key distinctions. Greek baklava typically uses a mix of almonds, walnuts, and sometimes pistachios, with a syrup infused with cinnamon, clove, lemon, and honey. Turkish baklava leans heavily on pistachios or walnuts and usually features a syrup made primarily of sugar and water, sometimes scented with rose or orange blossom. Greek baklava also tends to be spiced and slightly denser.
Is pistachio baklava Greek or Turkish?
Greek Baklava with pistachios is especially popular today, though traditionally it featured almonds and walnuts. Pistachio-forward variations of Greek Baklava offer both flavor and color, adding a modern twist to a classic.
Can I use store-bought phyllo for Greek baklava?
Absolutely! In fact, most home bakers, even in Greece, use store-bought phyllo because it’s convenient and consistent. Look for #4 or #7 thickness, and always keep it covered while working. Just make sure it’s fully thawed and not dried out. Coat each layer thoroughly with butter to achieve that ideal golden crunch.

