You could say I stumbled upon dream cake the same way you trip over a stone on a quiet trail, completely unexpected, but oddly magical. It was a rainy afternoon in Asheville, and I was knee-deep in one of my cookbook rabbit holes (you know, the kind where flour ends up in your hair and butter wrappers decorate the counter). That’s when I found it, Drømmekage, the Danish dream cake.
The name alone had me hooked. I mean, who wouldn’t want to eat something that sounds like it came from a fairytale?
I dug deeper, followed crumbs across Scandinavian blogs, and finally landed on a rustic little recipe tucked into a corner of a site called Scandinavian Cookbook. It reminded me of the sponge cakes my Greek grandmother made, but with a twist—a golden, bubbling coconut topping that looked like sunshine baked into sugar. I had to try it.
Let me tell you: that first bite? It tasted like warm vanilla clouds with a caramel crunch. Since then, dream cake has earned a permanent spot on my dessert rotation, and today, I’m sharing that slice of joy with you.
Table of Contents
Table of Contents :

Dream Cake Recipe: How to Make Drømmekage at Home
- Total Time: 1hour
- Yield: 15 Servings
Description
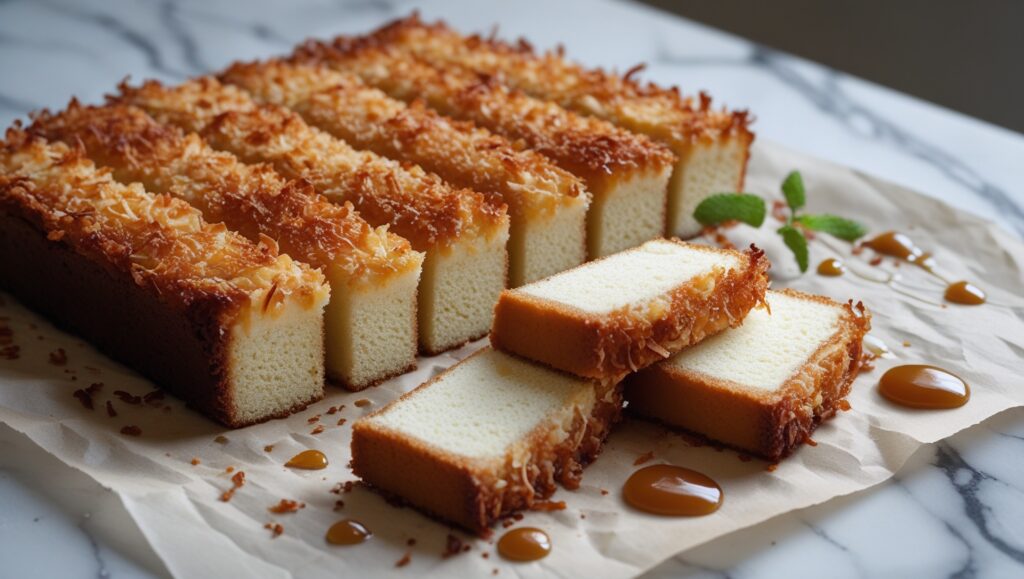
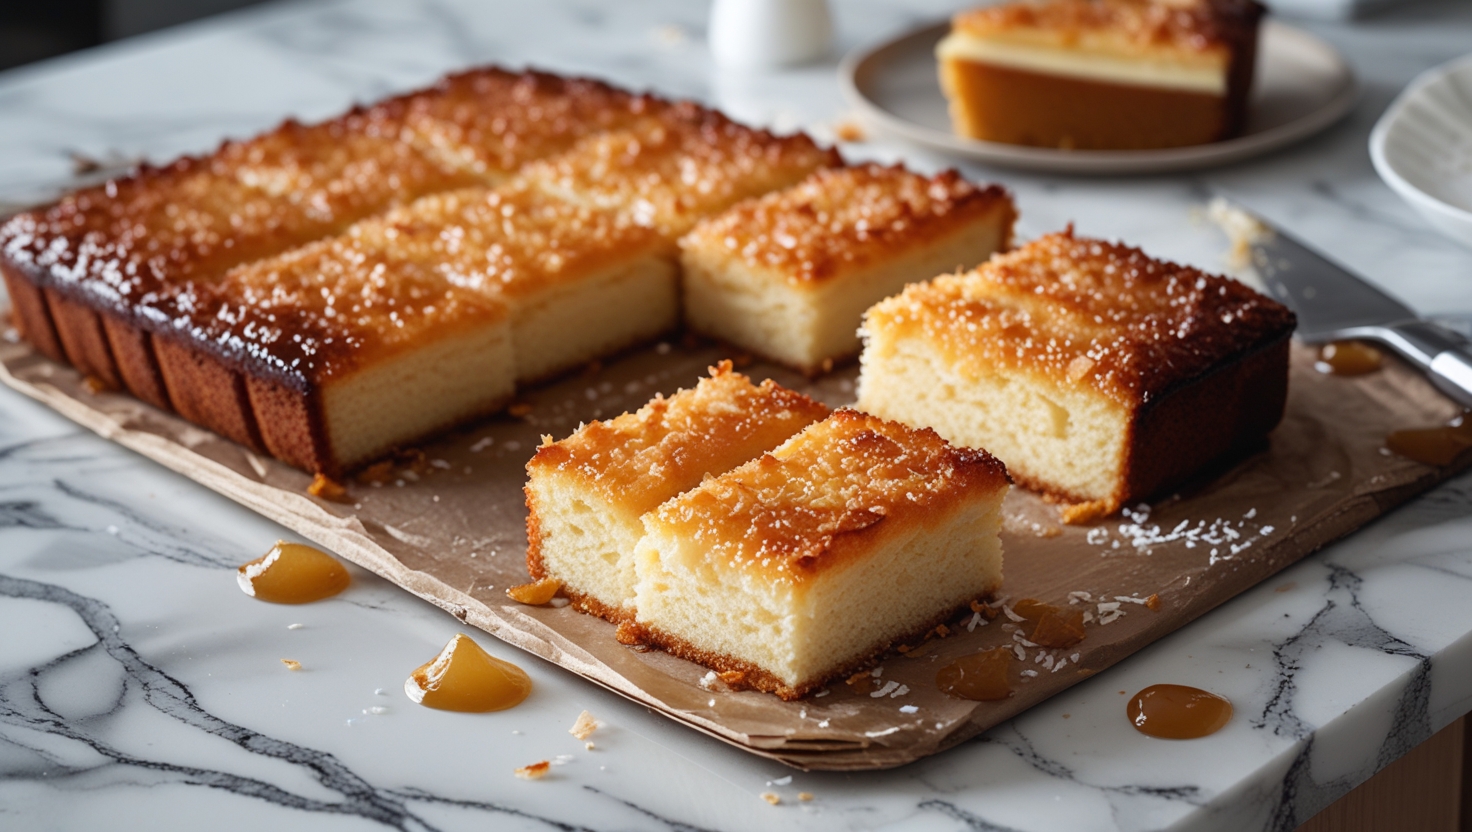
Danish Dream Cake is a light, buttery vanilla sponge cake with an incredibly flavorful caramelized coconut topping.
Ingredients
- 4 eggs
- 1 and 1/2 cups granulated sugar
- 3 and 1/2 tbsp butter
- 3/4 cup milk
- 2 cups all purpose flour
- 3 tsp baking powder
- 1 tsp vanilla sugar (or extract)
Coconut topping
- 1 cup + 2 tbsp butter
- 1 and 3/4 cups brown sugar
- 1/2 cup granulated sugar
- 3 tsp vanilla sugar (or extract)
- 1/2 cup milk
- 2 and 1/2 cups shredded coconut
Instructions
- Preheat oven to 390°F (200°C). Line cake pan with baking paper.
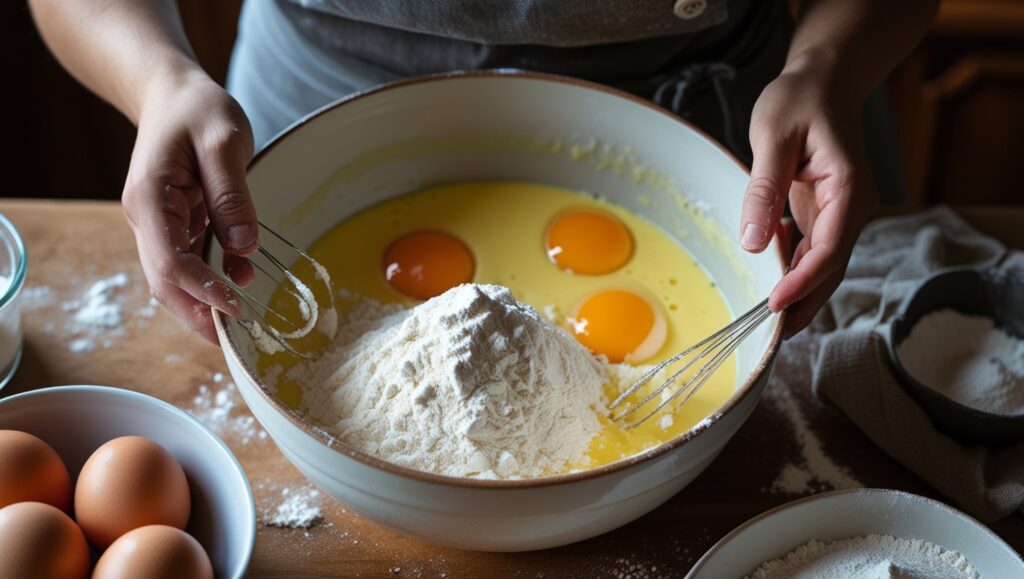
- Whisk eggs and sugar together with a mixer until they’re pale and fluffy.
- Melt the butter in a saucepan and add the milk.
- Mix the dry ingredients together and sift into the egg mixture. Carefully fold the batter, mixing as little as possible while still getting a smooth batter. Add the melted butter and milk, continuing to fold until smooth.
- Pour the batter into the cake pan and bake for 18 – 20 minutes, until the top is golden brown but not burnt.
Coconut topping
- While the cake is baking, melt the butter in a saucepan. Remove from heat and stir in the brown sugar, granulated sugar, and vanilla. Stir well and then stir in the milk and coconut.
- Remove the cake from the oven and pour the coconut topping over the cake. Use a spatula to even out the topping over the cake. Return the cake to the oven and bake for 6 – 8 minutes, until the coconut topping is fully bubbling.
- Let the cake cool in the pan before removing and cutting into squares.
- Prep Time: 30 minutes
- Cook Time: 30 minutes
- Category: Dessert
- Cuisine: Danish
Nutrition
- Serving Size: 15
- Calories: 194 Kcal
- Sugar: 20g
- Sodium: 105mg
- Fat: 7g
- Saturated Fat: 5g
- Carbohydrates: 30g
- Fiber: 1g
- Protein: 3g
- Cholesterol: 45mg
What Is a Danish Dream Cake?
Introduction to Dream Cake
What exactly is a Danish dream cake, anyway? Think of it as the love child of a soft, buttery vanilla sponge and a chewy, caramelized coconut topping that crackles like the top of a crème brûlée. This beloved Scandinavian treat has been cherished in Danish homes for generations, offering the perfect blend of cozy comfort and festive indulgence in every bite.
Locally known as Drømmekage, which literally means “dream cake” in Danish, it’s simple in appearance but rich in flavor. One bite and you’ll understand why it earned such a dreamy name.
Origin and Cultural Significance in Denmark
This dreamy dessert traces its roots back to Brovst, a charming village nestled in Jutland, Denmark. According to local lore, a young girl submitted her grandmother’s closely guarded recipe to a regional baking competition. The result? She took first prize—and the cake quickly captured hearts across the country, becoming a beloved staple in Danish households almost overnight.
But dream cake isn’t just about flavor—it’s about legacy. It’s the kind of cake grandmothers pass down, mothers serve with coffee, and kids sneak bites of when no one’s watching. In Denmark, it’s more than dessert; it’s a culinary heirloom.
How It Differs from Other Coconut Cakes ?
Don’t mistake this for your typical coconut cake—Dream Cake is in a league of its own. Instead of blending the coconut into the batter like most recipes do, this treat takes a different route, crowning the fluffy sponge with a rich, caramelized coconut topping that steals the show.
Also? The sponge is richer than you’d expect. Most cakes use water or oil, but this one’s loaded with melted butter and warm milk—hello, moisture! The result is a light sponge cake with a dense, chewy top that crackles and melts at the same time.
If you’re a fan of coconut caramel cake or even those gooey bars you find at holiday bake sales, this one’s going to blow your mind.
The History Behind Drømmekage
A Grandmother’s Recipe That Won Hearts
Every recipe has a story, right? Well, dream cake isn’t just a recipe—it’s a family legend. The origins of Drømmekage stretch back to the peaceful Danish village of Brovst. The tale begins with a young girl who, probably with batter still on her fingers, entered her grandma’s coconut cake into a local baking contest.
Here’s the twist: the recipe was a well-guarded family secret. Yet, it was so good, so impossibly fluffy and sweet, that it won first place and became an overnight sensation. Imagine that, one bite of a Scandinavian dessert changing dessert history!
Even today, you’ll find this coconut-covered sponge gracing bakeries and homes across Denmark. That small-town recipe? It turned into a national treasure.
From Brovst to All of Scandinavia
After the contest win, word spread like powdered sugar on a hot cake. The simple, light sponge cake with that bubbly coconut topping became wildly popular, not just in Denmark but throughout Scandinavia.
Families passed the recipe down like it was gold. It wasn’t just about baking—it was about remembering. And honestly, that’s what dream cake is all about. It captures a moment, a memory, a feeling. Whether you grew up eating it or just discovered it like I did, you instantly feel like it belongs in your story too.
Ingredients You’ll Need for the Perfect Dream Cake
Basic Sponge Cake Ingredients Explained
Making a dream cake starts with a buttery vanilla sponge that’s honestly so good it could stand alone. Here’s what you’ll need:
- Eggs: These are your main structure—fluff ’em up real good!
- Sugar: Granulated sugar brings the sweetness and helps with texture.
- Flour: All-purpose flour keeps it simple and classic.
- Butter and Milk: Instead of water, the sponge gets thinned with melted butter and milk—hello, richness!
- Vanilla Extract: Adds warmth and fragrance to every bite.
- Baking Powder: Just enough lift to make that sponge cloud-light.
Pro tip? Don’t skip sifting the dry ingredients. It keeps your batter lump-free and your sponge airy.
The Irresistible Coconut-Caramel Topping
Okay, this is where dream cake really starts to earn its name. The topping is basically a caramel coconut blanket that melts right into the sponge.
You’ll need:
- Butter: Again! Because there’s no such thing as too much butter in a cake.
- Brown Sugar + Granulated Sugar: For that deep, caramel flavor.
- Milk: Loosens the topping just enough.
- Vanilla: Layers more warmth into the flavor profile.
- Shredded Coconut: Unsweetened is best—it balances the sugary goodness.
Once it’s baked onto the sponge, it forms a bubbling, golden topping that’s chewy, crispy, and gooey all at once. It’s kind of like biting into the best part of a coconut macaroon—but better.
How to Make Dream Cake Step-by-Step
Preparing the Sponge: Mixing, Folding, and Baking

Let’s be real, baking a dream cake might sound fancy, but it’s honestly a breeze. You don’t need a culinary degree, just a little patience and a love for warm vanilla air.
Start by preheating your roaster to 390 °F( 200 °C). also line a 12 × 16 inch visage with baking paper. Trust me, this’ll make your life easier latterly when it’s time to lift that golden beauty out.
Now for the batter:
- Whisk together the eggs and sugar until the mixture turns pale and fluffy. A hand mixer works best, but you can do it with a whisk and some muscle.
- Melt your adulation, add the milk, and let it cool slightly.
- In a separate bowl, mix and sift your dry ingredients—flour, baking powder, and vanilla sugar or extract.
- Gently fold the dry mix into the fluffy egg mixture, being careful not to stir too much. That air? It’s pure cake magic.
- Eventually, fold in the warm milk and adulation admixture just until combined.
Pour it all into your set visage and singe for about 18 – 20 twinkles, or until the top is a light golden brown. Do not overbake we’re going for pillowy soft then.
Creating the Signature Topping: Coconut Caramel Mixture
While your sponge is baking, it’s time to make the part that gives dream cake its name: the topping.
Here’s how you do it:
- Melt butter in a saucepan.
- Take it off the heat and stir in brown sugar, white sugar, vanilla, and milk.
- also toss in the tattered coconut and blend until it’s completely carpeted and lustrous.
When the sponger is done, take it out of the roaster and pour the beating over it unevenly. Spread it out with a spatula so every inch is covered in caramel coconut virtuousness.
Layering and Final Baking Instructions
Once outgunned, pop the cutlet back into the roaster for another 6 – 8 twinkles. Stay close this part can go from comforting to disaster snappily if it burns.
You’ll know it’s done when the topping is bubbling across the entire surface—not just in the middle. The smell? Absolute heaven.
Let the cake cool fully in the pan before slicing it into squares. You want that topping to set a bit so it doesn’t slide off when you cut it. And just like that, your homemade dream cake is ready to wow.
Tips and Tricks for a Light and Fluffy Dream Cake
Why Sifting Flour Is a Must
You know how some cakes come out dense and sad? Not this one. One of the secrets to getting a light sponge cake is simple: sift your dry ingredients. It aerates the flour and keeps your batter lump-free.
That means you don’t have to mix much, which is great, because overmixing can ruin the delicate texture. Less stirring = more fluff. Trust the process.
Avoiding Over-Mixing the Batter
Speaking of mixing, let’s keep it to a minimum, shall we?
When you’re folding in the dry ingredients and melted butter mixture, do it gently. Think of it like tucking a blanket over a sleeping kitten, slow and careful.
Too much stirring knocks out all that lovely air you whipped into the eggs. And guess what? That’s what makes the dream cake sponge so soft, moist, and cloud-like.
Ensuring Even Coconut Topping Coverage
Here’s a tip I learned the hard way: spread the topping fast, but evenly.
As soon as the sponge comes out of the oven, pour that hot coconut mixture on top and get to work with your spatula. If you wait too long, the topping starts to thicken and doesn’t spread as smoothly.
Aim for even edges and a uniform layer. That way, every single bite gets a perfect combo of cake and topping—and isn’t that the dream?
For more delicious recipes and sweet baking stories, be sure to check back on About Tastes. We’re always mixing up something worth craving!
Storage, Shelf Life, and Reheating
How Long Dream Cake Lasts in the Fridge ?

So, you’ve made a big batch of dream cake—now what? First off, congrats! But if you’ve got leftovers (rare, but it happens), here’s how to store it.
Dream cake keeps really well. Just pop the cooled pieces into an airtight container and store them in the fridge. It stays fresh for up to 5–7 days, though most folks polish it off way sooner.
Make sure it’s cooled before storing, though—warm cake in a closed container turns soggy real fast. And nobody dreams of soggy cake.
Best Ways to Store for Freshness
If you’re keeping the cake out at room temperature (say, for serving over the next day or two), make sure it’s in a covered container. It’s best in a cool spot away from direct sun or heat.
Want to freeze it? Totally doable. Wrap each piece in plastic wrap, then place them in a freezer-safe bag or container. The sponge and coconut topping hold up surprisingly well. When you’re ready to eat, just thaw a slice at room temp or warm it up in the oven at a low setting.
Reheating is optional, but a quick 5-minute warm-up in the oven can revive the coconut topping’s crunch and bring back that just-baked magic. Bonus: your kitchen will smell amazing again.
Dream Cake Variations and Similar Recipes
Silviakaka: The Swedish Cousin
If you’re loving dream cake, you might also want to meet its cousin, Silviakaka. This Swedish classic is another vanilla sponge, but the topping is creamier, with a custardy coconut feel. It’s a bit lighter on the coconut, but just as sweet and comforting.
The main difference? Silviakaka often skips the caramel crunch and leans into a softer, silkier vibe. But if you’re into the whole Nordic dessert scene, it’s worth adding to your baking list.
Both cakes are proof that Scandinavia knows how to do “simple but unforgettable” desserts really, really well.
Modern Takes: Gluten-Free, Dairy-Free, Cupcakes
Wanna remix the classic dream cake? There are tons of modern twists out there, especially for folks with food restrictions.
- Gluten-free? Use a 1:1 gluten-free flour blend. It works like a charm.
- Dairy-free? Swap butter for vegan margarine and regular milk for almond or oat milk.
- Cupcake interpretation? Yes, you can! Divide the batter into muffin drums and reduce the baking time. Just ladle the beating on and return them to the roaster for that final golden bubble.
For more recipe follow me in pinterest
Frequently Asked Questions (FAQ)
What is meant by Dream Cake?
A dream croquette or Drømmekage in Danish, is a soft vanilla sponge croquette excelled with a rich, gooey caste of caramelized coconut. The name fits perfectly because this croquette feels like a dream in every bite, light, sweet, and comforting.
It’s one of Denmark’s most loved Scandinavian desserts, often baked for birthdays, coffee breaks, and cozy family gatherings. Simple, rustic, and unforgettable.
Why Dream Cake is Popular?
Let’s be honest, dream cutlet is popular because it checks all the boxes.It’s easy to make, it uses basic ingredients, and the results are out-of-this-world delicious.
People love the contrast between the airy sponge and that chewy, golden coconut topping. Plus, it looks impressive without being fussy. One bite, and you’ll know why it’s a go-to recipe across generations.
What is Elvis Presley Cake?
Although it sounds similar, Elvis Presley cake is a totally different treat. It’s an American dessert made with yellow cake, crushed pineapple, and a creamy topping, usually cream cheese or whipped topping with pecans.
Both cakes are rich, nostalgic, and loaded with texture, but dream cake keeps it simple with coconut and vanilla, while Elvis’s version brings in fruit and nuts.
How Long Does Dream Cake Last in the Fridge?
Stored right, dream cake can last up to 5–7 days in the fridge. Just keep it in an airtight container to maintain that dreamy texture.
Want it to taste fresh again? Reheat a slice in the oven for 5 minutes and enjoy the topping as if it just came out of the oven. Total game-changer!

